Thursday, June 30, 2011

SMASH Book turned Stamp Catalog

I have finally finished my latest project.  I received this SMASH book in the mail a few weeks ago, but when I opened it I noticed it had been bound backward.  All of the pages were upside down, so I tired to find a creative way to work around this.  I decided to create a catalog to index all of my acrylic stamps. 
I used the Mod Black SMASH book and the “For the Record” paper collection by Echo Park. 

Here's how I started: I already had my stamps organized into 6 bins - Sentiments, Accent, Nature & Floral, Celebration & Holiday, Background & Journaling, and Alpha.  I took each bin and looked the stamp set up on Google images.

If I found the stamp set, I saved the picture to a folder on my Desktop.  If I didn't find the stamp set, I scanned it using my HP Photosmart Scanner.  I then inserted all the photos into a Word document and then printed them on white cardstock. 

I cut all the pictures out and started decorating my SMASH book. 

I covered the front, back, inside covers, and all 6 section title pages with papers from the collection. 

I used the Paper SMASH Tabs to divide the 6 sections of my catalog.
Front Inside Cover
Title Page with Table of Contents
Sentiment Stamps
Accent Stamps
Nature & Floral Stamps
Celebration & Holiday Stamps
Journaling & Background Stamps
Alpha Stamps
Back Inside Cover

Here’s a peek at the inside. I used my ATG gun to adhere all the index prints down, so they wouldn’t go anywhere.

Still have 3 more SMASH Books left.  I plan on using 1 of them as a Mommy-To-Be Journal someday….soon! :)

Saturday, June 25, 2011

Scrap Happy

Do you save ALL your scraps?  Well, I do and I have so many I have to start using them up.  If I have a paper collection that I love, I have a really hard time throwing any of it away....even if it's a tiny piece.  I store all my scraps from specific collections in Ziploc bags like this one.

Well, the Portrait Collection by Crate Paper is one of my all-time favs!  So, of course I have a lot of little scraps. :)

I decided to create a project with my scraps and here's what I came up with.  Since I have a ton of little bitty pieces, I decided to create a patchwork quilt or collage piece using the scraps.  First, I tore the paper and sorted them into piles.

I then cut a piece of scrap kraft cardstock and put down some glue.  I used my Scotch Quick-Dry Adhesive for this and it worked great!

I randomly began putting scraps down and covered the cardstock.  After it was completely covered, I took it to my paper trimmer and cut it down.

Here's what it looks like:

I then created a card with this cute piece.

....and this is why I save all my little bitty paper scraps.

Thanks for stopping by!  I have a great idea for one of my SMASH books and it involves stamps, stay tuned to find out more. :)

Thursday, June 23, 2011

A SMASHing Idea!

I got my SMASH book a few weeks ago, but haven't dared to touch any of the stuff yet.  I don't want to, I just want to hoard it because I love it so much.....but I have decided to go ahead and break it open!  I am so in love with this new concept by K & Company, so much fun and so cheap!  A SMASH book is only around $13.00.  Blue Moon Scrapbooking just listed them on their website yesterday - SMASH Journal

Photo taken with my new camera :)

If you DON'T like to scrapbook because it's too tedious and fussy, then this is for you.  And if you DO like to scrapbook, this is for you too because it's super fun!  

And if you don't know what a SMASH book is, watch this and you will quickly find out why I am so excited about these new products!


My question for the day....what should I put in my 1st SMASH book?  (Yes, I own 4!)  What are you putting in your SMASH book? :)

Tuesday, June 21, 2011

1st YouTube Video

I have had several people ask me to take pictures of my scrapbook room, so I created a video showing every little nook and cranny of my studio.  Hope you enjoy! :)


Sunday, June 19, 2011

Father's Day Cards

Here are a few cards that I whipped up for Father's Day for my Dad, Father-In-Law, and Grandpa.  I used the "A Proper Gentleman" collection by Graphic 45.


Here is a list of the materials I used to create these cards:
Vintage Cream PaperTrey Ink cardstock
True Black PaperTrey Ink cardstock
Kraft PaperTrey Ink cardstock
Tim Holtz Walnut Stain Distress Ink and Stain
MFT Dienamics: First Place Award Ribbon
"A Proper Gentleman" paper collection by Graphic 45
Cardboard
Black stain ribbon from Hobby Lobby
"Holiday Hooplah Simple Stick Stamps" by Fiskars 

Saturday, June 18, 2011

Etsy Showcase

Today my Etsy shop is featured on the front page of Etsy's Paper Goods section!  My "Language of Friendship" card is on the top row, super excited. :)

Friday, June 17, 2011

Thursday, June 16, 2011

Wedding Card

Here's a wedding card I created today.


Here is a list of the supplies I used to create this card:
MFT Stamps - Clearly Sentimental About the Journey
Inkadinkado Stamps - Expressions and Frames
GCD Studios Paris Nights paper collection 
Vintage Cream PaperTrey Ink cardstock
True Black PaperTrey Ink cardstock
Candelabra Wooden Flourish by KaiserCraft
Roosevelt Collection Delano Flower by Prima
I Am Roses - R2-505, R8-69
Nestabilities Label Four
 LSG Desert Moon Cactus Gold Glitz Spritz
LSG Starburst Stain Golden Sleigh Bells
LSG Starburst Stain Opal Sea Oats
Black satin ribbon from Hobby Lobby

This card was so much fun, I l-o-v-e weddings! :)

Dress Form Canvas


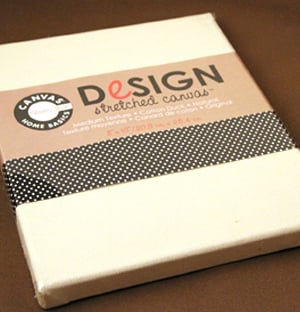
I created this canvas as a gift for someone.  It started out as just an 8 x 10 stretched natural canvas, like this one.  Nothing great and really kinda boring, but not after I got my hands on it! :)


I painted it with Folk Art Metallic Sahara Gold acrylic paint and then glued on a piece of flocked damask designer paper by GCD Studios from the Paris Nights Collection. 

FolkArt Metallic Acrylic Paintpads/Paris-Nights-12x12-Cover.jpg

I then began layering a bunch of goodies onto the canvas.  The dress forms are Wooden Flourishes: Manequins by KaiserCraft and the Say it in Crystals black corner bling is by Prima.  I hot glued down some black sequin lace and then layered a bunch of flowers from I Am Roses.  


Here is a list of the different flowers that I used: G3-153, R77-310, R21-410, T25-152, R2-505, and R2-840.  I used the following Lindy's Stamp Gang sprays to color the flowers: Opal Sea Oats Starburst Stain, Golden Sleigh Bells Starburst Color Shot, and Desert Moon Cactus Gold Glitz Spritz.  


I curled the edge of the damask designer paper back with my paint brush and then edged it with Tim Holtz Walnut Stain Distress Ink.  I used the Ornamental Movers & Shapers Die by Tim Holtz to cut out the black frame and then glued on the quote by Helen Keller. 


Saturday, June 11, 2011

New Camera!

I just bought a new camera!  Expect some great pictures very soon.  Hopefully I can re-shoot the items I have for sale in my Etsy shop.  My old camera just doesn't cut it!!

Here's what I will be using now.

The battery is charging and I am patiently waiting to play with my new toy! :)

Friday, June 10, 2011

Happy Birthday Card

Here's the next item I will be putting up for sale in my Etsy shop.  

I created this card using the Oliver paper collection by Basic Grey.  I also used some Bazzill Dotted Swiss cardstock, gray cardstock, and a piece of chocolate fudge cardstock for the base.  The stamp is Oh Boy! Ian by The Greeting Farm.  I colored the image up with my Copics and cut him out with my Classic Ovals Large Nestabilities.  

Here are the Copic markers I used to color up Ian.
The "Happy Birthday" sentiment is from an acrylic stamp set by Close to My Heart.  The buttons are also from CTMH, which you can purchase from yours truly - http://whimsycrafts.myctmh.com/Home.aspx?PageMode=Live.  (I'm just sayin'.)  I picked the brown May Arts burlap string up at Stamper's Dream.  The edges were distressed using my Tim Holtz edge distress tool and Walnut Stain distress ink. 

Here's a peek of the inside.

Check out Whimsy Crafts Boutique, I am adding new items each day and my prices are very reasonable.....much cheaper than Hallmark! :)

Thursday, June 9, 2011

MFT Pure Innocence Stamps

I just love the MFT PI stamps!  They are so much fun to color up with Copics.  Here's a card that I created.


I used the Pink Paislee Butterfly Garden collection to create this card.  I picked it up at Stamper's Dream, but it's currently sold out.  I used my Big Scalloped Circles Large Nestabilitites die to cut out both scalloped cirlces.  The sentiment came with the PI Butterfly Kisses stamp set. 
Isn't she the cutest?
 I colored her up with my Copics.  Here are the colors that I used.
All of the roses are by Prima.  The cherry blossoms and skeleton leaves are from I Am Roses.