Tuesday, January 24, 2012

Announcement: Lindy's Stamp Gang Design Team

I am so excited to share some wonderful news with you today....Lindy's Stamp Gang has asked me to join their Design Team!!!  When Tracey contacted me, I was in absolute disbelief.  I ♥ LSG and cannot create a project without using their products.  I am elated, over the moon, super excited...I think you get the picture! Hehe :)

Here are a few projects I created for LSG...

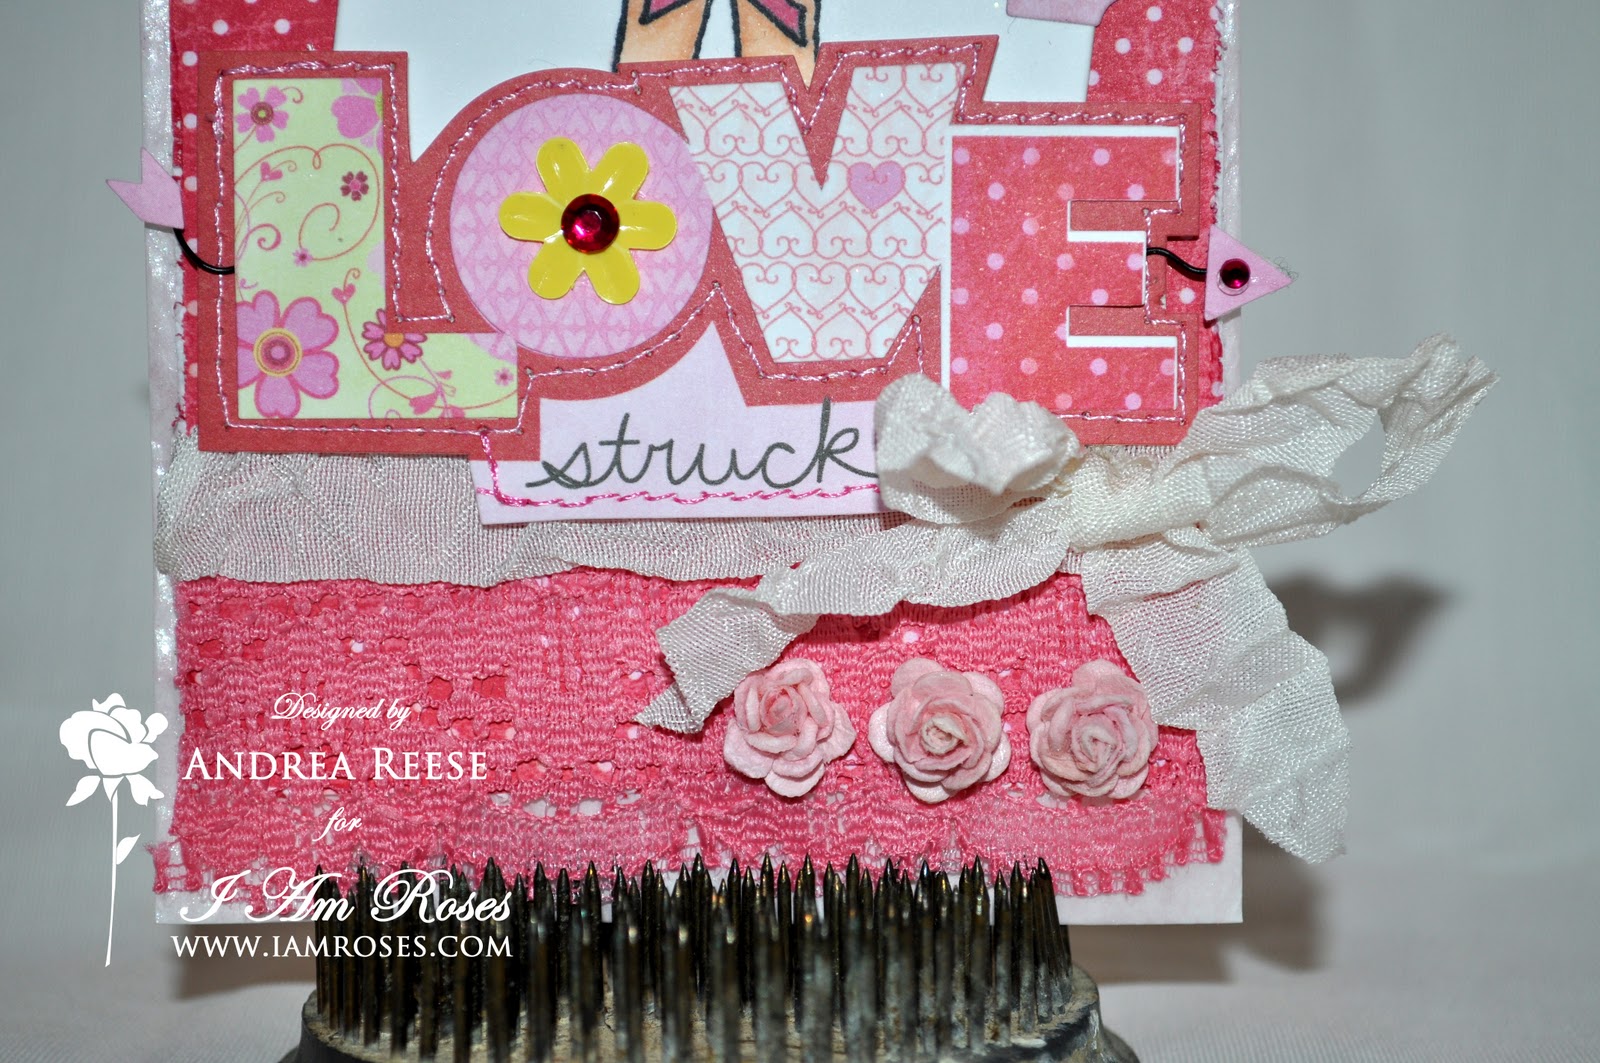
A card for my Valentine
This card measures 5.5" x 5.5".  The base of the card is made of kraft cardstock and layered with some designer paper.  


I altered up a glassine bag to hold the tags I created.  I sprayed the bag with Cotton Candy Pink Starburst Spray.  I then used the Midnight Pewter Obsidian Embossing Powder to emboss the sentiment on the bag.  

The flowers also have a gorgeous shimmer.  The large pink rose was sprayed with Pretty in Pink Pink Starburst Spray.  The pale pink rose and creme cherry blossom were sprayed with Desert Moon Cactus Gold Glitz Spritz.

Here's a peek at the inside...
Click HERE to watch a video on how I created this card.


The second project I created was a Valentine Canvas Mini-Album.  This canvas mini started out a neutral color.  I painted the outer canvas cover with my Dark Chocolate Truffle Color Shot.

The handmade envelope was sprayed with Desert Moon Sunset Pink Glitz Spritz.

I love how the Cotton Candy Pink shimmers on this canvas page.  The mulberry flower was sprayed with Azure Sea Asters and the hand dyed seam binding was created using Cotton Candy Pink.

The mini roses were sprayed with Desert Moon Sunset Pink Glitz Spritz.

This adorable canvas page was sprayed with Azure Sea Asters and the flower was created using some loose mulberry petals sprayed with Cranberry Mist Burgundy and the light pink flowers were sprayed with Desert Moon Sunset Pink Glitz Spritz.

Cranberry Mist Burgundy hand dyed seam binding.


The last canvas page was sprayed with Cranberry Mist Burgundy.  Click HERE to watch a video on how I created this canvas mini.

I love these Valentine "Snow Globes."  This is such a versatile project.  You can alter it for any holiday/occasion.  I used smooth sided Mason jars and altered them up!  I took strips of white cardstock that I sprayed with Creme Brulee Cream, Poinsettia Red Gold, Cotton Candy Pink, Hottie Patottie Hot Pink, and Pretty in Pink Pink and then punched out each heart to create the confetti in each jar.


The lid of this jar was painted with Berry Red acrylic paint that I mixed a bit of Alpine Ice Rose Magicals into.  The Magicals just give it the perfect shimmer.  The sentiment was stamped onto a piece of white cardstock that had been sprayed with Cotton Candy Pink Starburst Spray.  I hand-dyed some white seam binding with Hottie Patottie Hot Pink and Poinsettia Red Gold and tied it in a bow.


I added a glitter Styrofoam heart on a bed of lace and showered it with some more of my handmade confetti.


The lid of this jar was painted Warm White and then sprayed with Scintillating Silver Glitz Spritz.  I also sprayed the crocheted flower center with Scintillating Silver Glitz Spritz and added a bit more handmade confetti.
Click HERE to watch a video on these adorable snow globes.


My final project is a handmade pennant banner.


I cut the pennant banner base out of brown cardstock and sprayed it with Cotton Candy Pink Starburst Spray.  I layered on some designer paper.  The flowers were sprayed with Cotton Candy Pink Starburst Spray as well.  I cut the bird cage out sprayed it with Scintillating Silver Glitz Spritz.  The birds were sprayed with Dark Chocolate Truffle and then Scintillating Silver Glitz Spritz.


I painted the grunge board letters using the Dark Chocolate Truffle Starburst Color Shot and then sprayed them with Scintillating Silver Glitz Spritz.


I tied the banner together with white seam binding and added some resin flowers at the base of each pennant.  Click HERE to watch a video on how I created this pennant banner.


I am so excited to join the lovely and talented ladies of Lindy's Stamp Gang.  Thanks for stopping by today! HUGS ♥

Sunday, January 22, 2012

I Treasure You

Today, I am posting a card for our weekly challenge over at Queen of My Craftroom.  Our challenge this week was to create a card using a stamped image that is colored.  We weren't allowed to use any die-cutting machines (Cricut, Big Shot, Vagabond, etc.)  Not so easy, that's for sure.  Hehe :)  I used 3 of my favorite products: MFT stamps, I Am Roses flowers, and LSG Magical Micas.  The card is 5.5 x 5.5.


The papers I used are from the Perfect Day collection by CTMH.  I edged all the papers with TH Distress Ink in Vintage Photo.  The adorable mermaid stamp is by My Favorite Things - "Who's That Mermaid?"  I colored the stamp up with my Copic markers and here are the different combos I used.

Skin: E000, E00, E11, E21
Sand: E30, E31, E33, E34
Water: BG11, BG13, BG15, BG18
Sky: B000, B00, B01, Colorless Blender
Fin: BG72, BG75
Top: R59

I colored the mermaid's fin with my Copic markers and then used my LSG Magical Micas in Tainted Love Teal.  Isn't the shimmer gorgeous?


I used some aqua satin pleated trim by Maya Road and then topped it with some flat back pearls that I had in my stash.  I combined a bunch of flowers from I Am Roses and used some starfish like you would leaves.  I just love how cute this is.  The large teal flower was originally white, but I used my LSG magical micas to color this up too!  I also nestled in some pearl accents to fill in the gaps.


The sentiment is from the "Who's That Mermaid?" stamp set. 


Here's a peek at the inside.  Hope you liked today's project and that your day is filled with Love & Whimsy! :)

Saturday, January 21, 2012

Shabby Chic Altered Glass Jar

Hi everyone!  I'm back again with another project for I Am Roses.  I created a "Shabby-Chic" altered glass jar.  It turned out so super cute...I love to alter these jars.  They are so quick and easy to make.

Here's my finished glass jar...

I used some gorgeous I Am Roses products on today's project.

A birds nest is tucked down in the jar on top of some Spanish moss and filled with some cute, whimsical items.

I used a rub-on that I had in my stash and rubbed it directly onto the jar.

Super cute, super fun, and super versatile.  I  that!

I Am Roses products used:

Click HERE to watch a video of this altered glass jar.  Don't forget to check out I Am Roses for some of the yummy flowers listed above.  I hope the rest of your weekend is filled with Love & Whimsy.  HUGS! :)

Friday, January 20, 2012

I Am Roses "Love is in the Air" YouTube Contest

TGIF!!  Weekend = Crafty time, and that's great because we are having a "Love is in the Air" contest over on the I Am Roses Challenge Blog.  Here are all the details...

Title: I Am Roses  "Love is in the Air" Contest 
Theme: Valentine's Treat Bags/Boxes/Goodies 
Challenge: Incorporate Lace 
Contest Date: Jan. 20th - Feb. 10th (11:59am PST) 
Winner Announcement: Feb. 14th (Valentine's Day)

Rules:
Minimum 2 I Am Roses products used
Incorporate Lace
Submit Project as a "Video Response" to the Official IAR Challenge Contest Video
1 Entry submission per contestant
1 Winner will be selected
Subscribe to IAR YouTube Channel

The IAR Design Team is playing along as well, here's the treat bag I created.  It started out as a glassine bag that I sprayed with LSG Cotton Candy Pink and then heat set.

Isn't she the cutest?  I colored her up with my Copics and paper-pieced her dress.

Here are the Copic colors I used:
Skin: E000, E00, E11, E21, R20
Hair: E25, E74
Heart: R83, R85

I added a touch of lace and some hand-crinckled seam binding at the bottom of the bag.

And of course, some beautiful I Am Roses flowers.

Here are the links to the I Am Roses flowers I used:

Check out my video HERE for a closer look at my Valentine treat bag....and don't forget to head on over to the I Am Roses Challenge Blog so you can join in on the fun!  I can't wait to see what everyone creates.  I hope everyone has a weekend that is filled with Love and Whimsy.  HUGS! ♥

Saturday, January 14, 2012

Winter Altered Banner

Hi guys!  I'm back with another project for Queen of My Craftroom.  Our challenge for this week was to create an altered project with a "Winter Theme."  I used my Sizzix Framelits Pennant Scallop Banner Die to create the banner.  I ♥ banners, ok...I may be a little obsessed with banners. Hehe :)

Here's my altered project...


I have a shelf in my house that I decorate for the different seasons.  This banner was the perfect addition. :)

I used kraft cardstock by PaperTrey Ink as the base for my banner.  I sprayed it with Scintillating Silver Glitz Spritz by Lindy's Stamp Gang.  Isn't the shimmer gorgeous...?

Here's a close-up of each letter.


The DP I used is from the "Signature Christmas" Holiday Glitter Paper Stack by My Mind's Eye, such beautiful paper.


Other products used:
Warm White Acrylic Paint
Scintillating Silver Glitz Spritz by Lindy's Stamp Gang
Creme Brulee Cream Starburst Spray by Lindy's Stamp Gang
Fantasy Snow by Delta

I hope you enjoyed today's altered winter project.  I hope everyone has a week that is filled with Love & Whimsy! HUGS :)

Monday, January 9, 2012

Altered Frame Necklace Hanger

Happy Monday!  I hope everyone had a wonderful weekend and is ready for the start of a new week. :)  I created an altered project today for I Am Roses.  I received this frame as a gift for Christmas and I couldn't wait to get in my studio and alter it up! Hehe :)

Here's a peek...

I love how cute it turned out.  I created a banner using my Sizzix Framelits Pennant Banner Die and some "Breeze" paper from the My Mind's Eye Lost and Found Two Collection.  I used some chipboard letters that I had in my stash to spell out love.

The IAR flowers on this project are out of this world!  Absolutely beautiful...


I had to add a bird cage.  I ♥ anything bird related. LOL :)


I Am Roses products used:
3" Roses (sprayed with LSG Gator Gumbo Olive)
Medium Brown Daisy Flowers (sprayed with LSG Royal Peacock Fire)
White 2" Rose (sprayed with LSG Desert Moon Cactus Gold)
Puffy Semi-Open Rose Buds (sprayed with LSG Gator Gumbo Olive)
1 1/4" White Flowers (sprayed with LSG Desert Moon Cactus Gold)
1/2" White Flowers (sprayed with LSG Desert Moon Cactus Gold)

Click HERE to watch a video of this altered frame.  Hope you enjoyed today's project and check out I Am Roses for all of the flowers listed above.  I hope everyone has a week filled with Love and Whimsy.  HUGS! :)

Sunday, January 8, 2012

Warm Winter Wishes

Hi guys!  I'm back with another project for Queen of my Craftroom.  Our challenge for this week was to create something with a "Winter Theme." 

I created a "Warm Winter Wishes" card with a snowman on it, of course! :)

I created this card for my brother who lives in Seoul where it's super cold.  The card base measures 5.5" x 5.5" and is made of kraft cardstock by PaperTrey Ink.  The DP I used is from the "Picket Fence" Collection by Lily Bee Design.

I love this snowman, he's so adorable.

I used the Holiday Hugs Snowman stamp set by MFT.  I added a bit of shadow with my T0 and T1 Copic markers.  I paper-pieced the hat and scarf using some of the DP listed above.  Fantasy Snow by Delta is so neat, I love how it adds texture to the card.

Here's a peek at the inside...

Other products used:
Hope you enjoyed today's challenge.  Sending you Warm Winter Wishes with Love and Whimsy.  HUGS